Menu

SheKnows Media ‐ Beauty and Style
© Copyright 2003-2014 SheKnows, LLC.
All Rights Reserved.
Melissa Dunlap is a writer, editor and blogger specializing in lifestyle communications. Fueled by curiosity, and a tad too much coffee, Melissa enjoys dissecting current trends for the modern woman. When she's not having dance parties w...
Throughout the craft, it's important to create crisp folds. A bone folder can help make this easier.
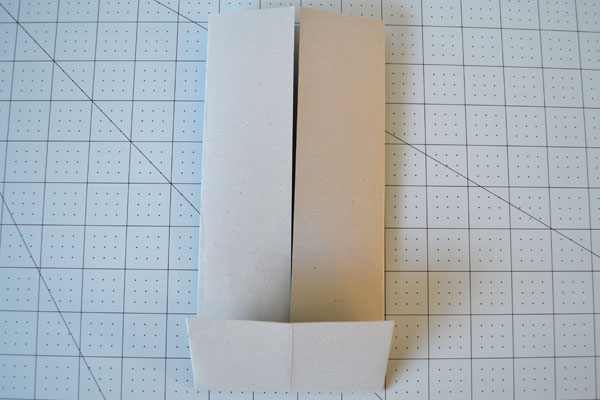
If using decorative paper, turn the paper over so the right side is facing down. Fold the paper in half.
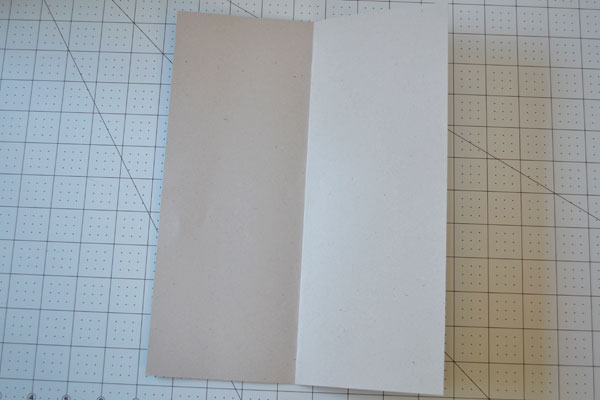
Lay the paper flat and fold each side up into the center fold. Open up paper and lay it flat.

Take the bottom left-hand corner and fold it in to the first fold line. Repeat on the other side.
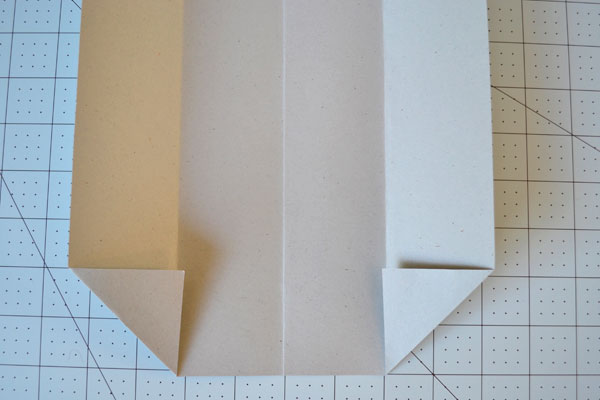
Close the folds back up so the outside sides align with the center fold.
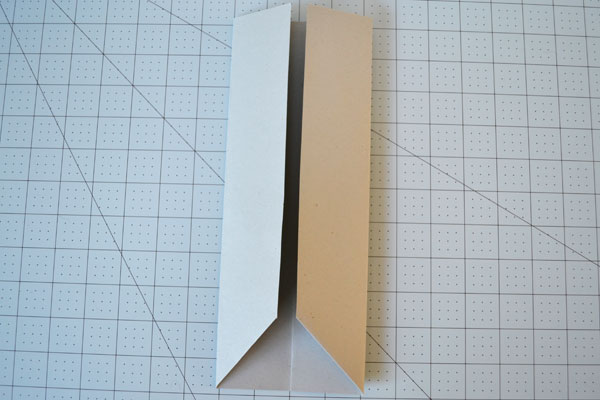
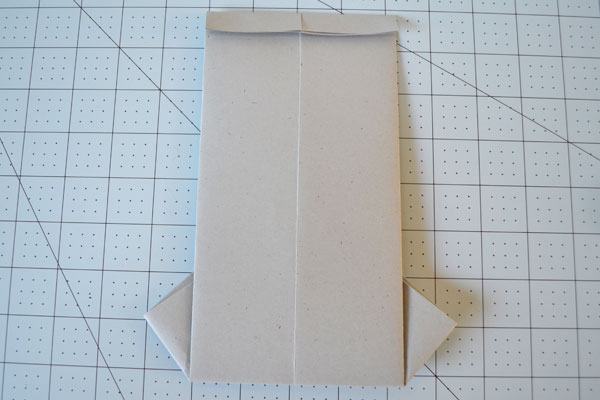
Take the bottom side of the paper and fold it up just beyond the upside-down V. Make a nice, crisp fold.
Open bottom fold out again.
Where the paper joins in the middle of the center V, take the inside point and fold it out to the left side edge of paper.
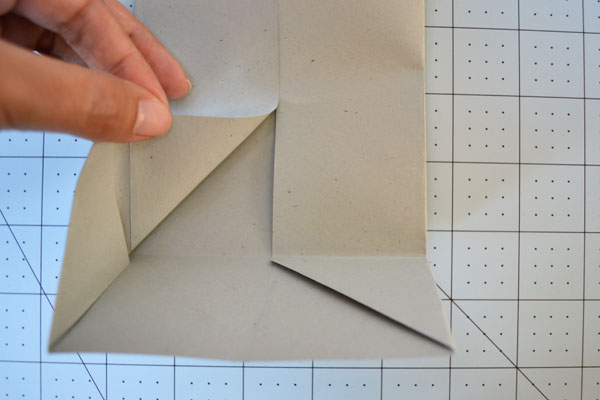
Repeat on the other side. Note: the paper will come up slightly on the bottom.
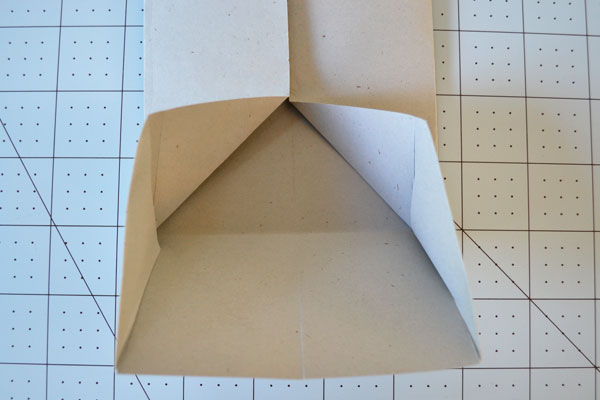
Take the bottom of the paper and fold it up to just beyond the upside down V. Crease it nice and sharp.
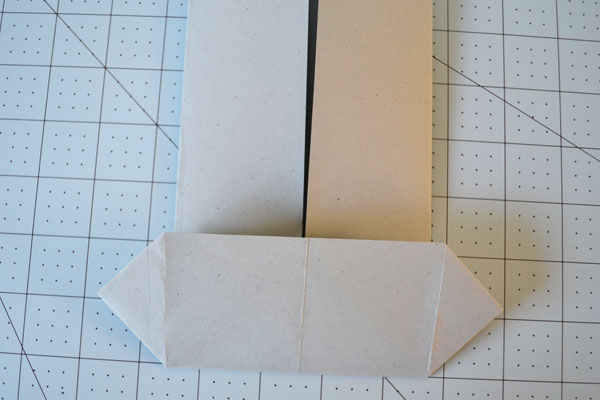
Flip the paper over and go to the top. Fold the top portion over about 1/2-inch (approximating the measurement is fine) so there is a crease at the top.
Flip the paper over so the top crease is to the back. Bring the top left corner to the center fold so that it creates a triangle shape.
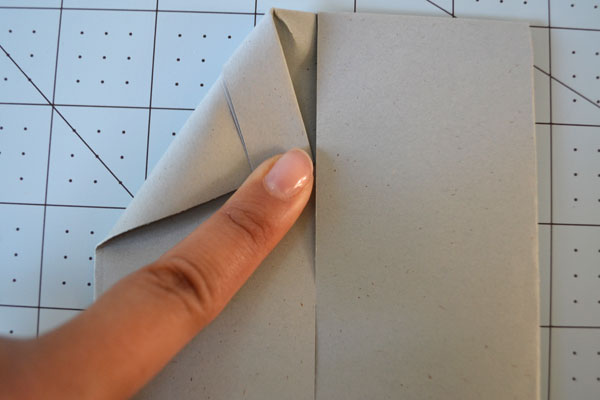
Repeat on the right side. Make sure folds are sharp.

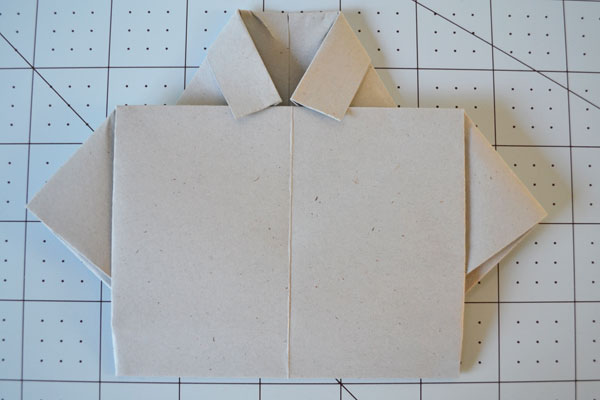
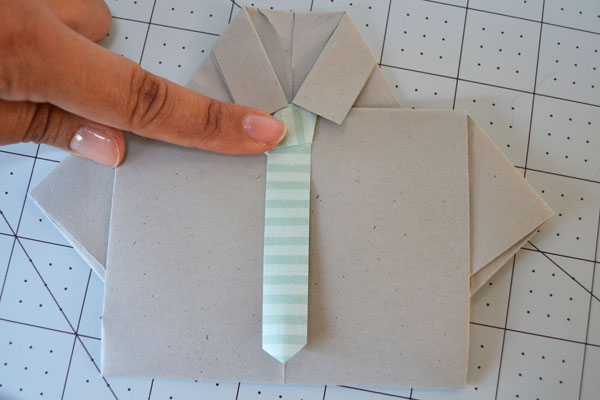
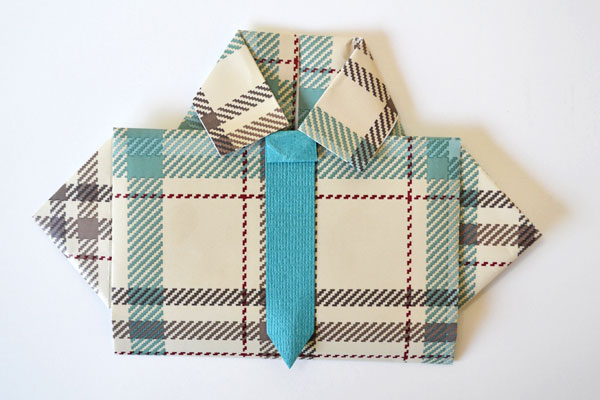
Bring the bottom end up and tuck it underneath the top flaps (the shirt collar). Now you have your basic shirt shape!
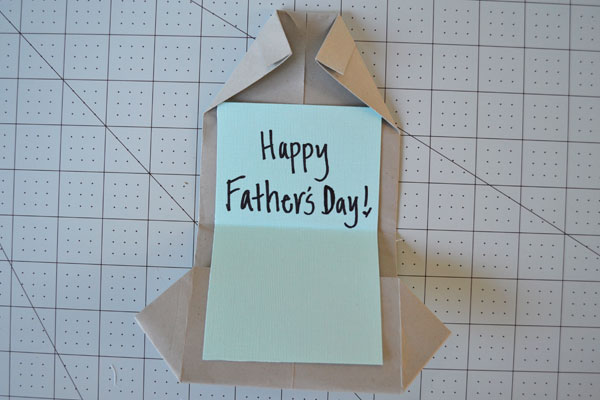
To add a personal message inside the card, cut out a piece of cardstock that can fit inside the card. The one used here is approximately 3-1/2 inches by 5-1/2 inches. Secure it to shirt with glue or double-sided tape. Write dad a note.
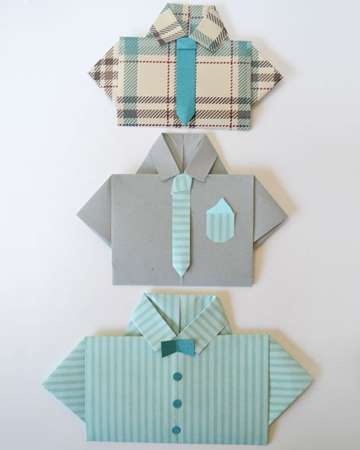
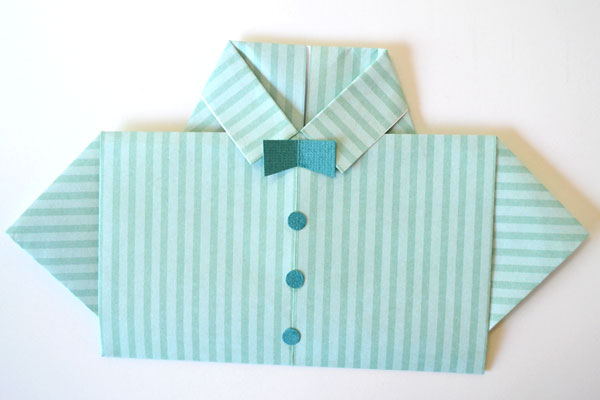
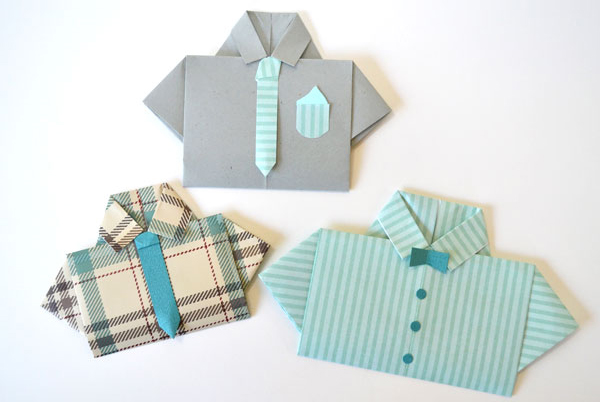
Add embellishments to the outside of the shirt to give it some of dad’s style. Ideas to consider include a tie, pocket, bowtie, or buttons.
To make a tie: cut a 1/2-inch strip of decorative paper. If you know how to knot a tie, now’s the time to show your skills. If not, fake it by looping strip around the top until a faux knot is created.

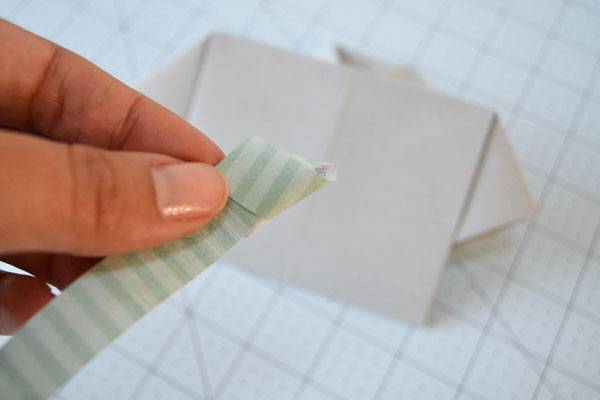
Snip the bottom corners of the paper to create a pointed end. Secure to shirt with a dab of glue or double sided tape.
To add a pocket, cut a small square of decorative paper and round-out the bottom edges (tip: use a circle template to get a round bottom). Using the same paper as the personalized message, free-hand cut a small shape to serve as the hanky. Secure it to the shirt with glue or sticky tape.
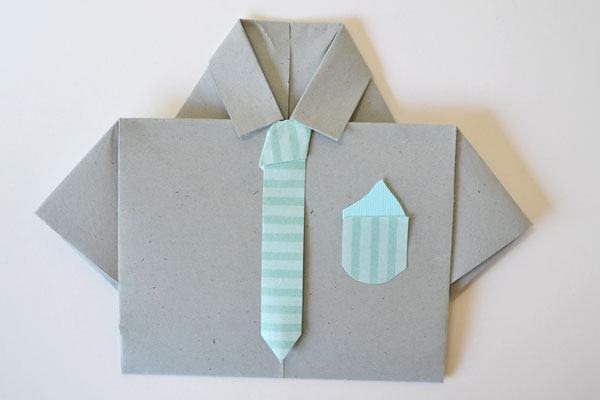
To add a bowtie, cut a small rectangle and slightly snip the corners on a diagonal. Add buttons by using a hole punch. Secure it to the shirt with a dab of glue or sticky tape.
Wrapping paper also works as a substitute for cardstock or decorative scrapbooking paper. This one was made from leftover Christmas wrapping paper. Wrapping paper wrinkles a little easier, though, so if you're using it, plan to make one as a mockup or be very precise when making the first folds.
iDad Father's Day card
DIY Father's Day t-shirt
Father's Day craft for kids
And you'll see personalized content just for you whenever you click the My Feed .
SheKnows is making some changes!