A House Update – Exterior Reno!
On the home front, so excited to see my baby Sammy model for Bethie Life, a high style fashion blog. She had so much fun!! They styled her with full makeup, hair, clothes and jewelry all for this week’s Ladies in Red at Saks!! See the entire shoot at BethieLife.com. Below the house update!
February 2015 marked the passing of one year since I’ve been renovating our family home of 29 years. I am grateful for this blog for chronicling the progress! Today I’m so excited to share an update with you on my home’s exterior!
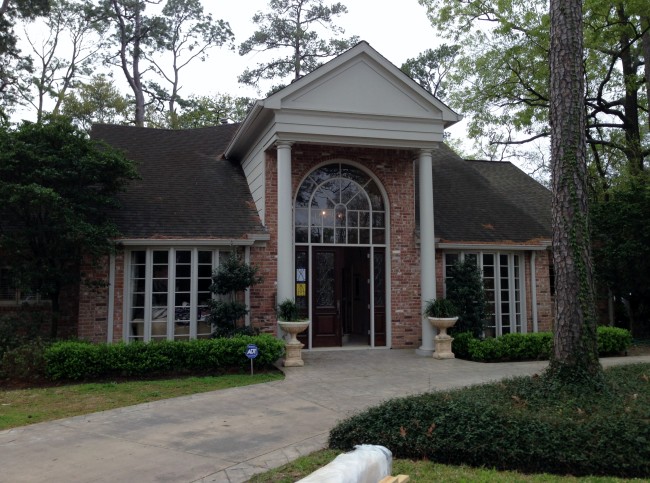
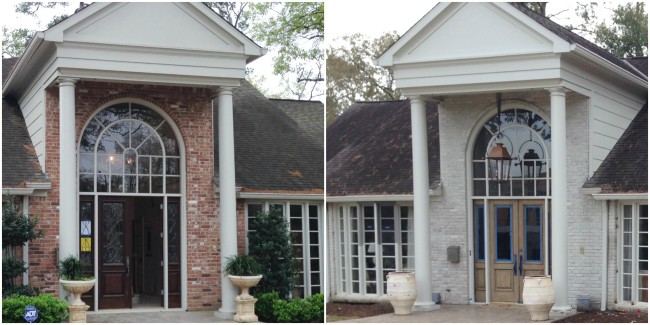
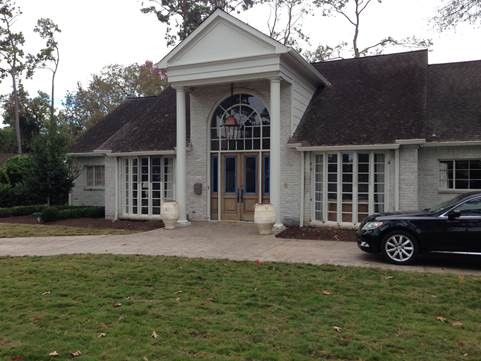
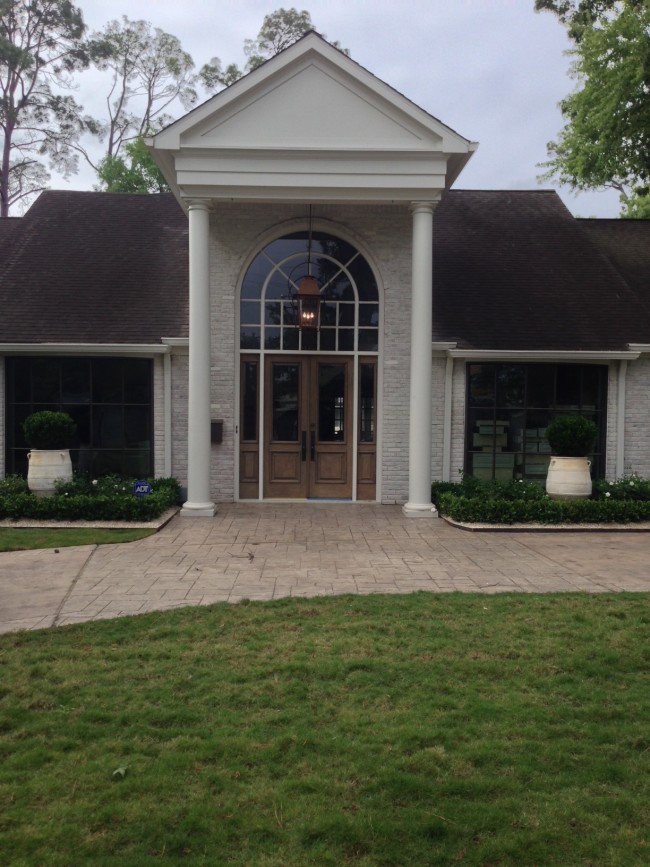
This is a picture of the exterior as we were getting started. I wish I could find a picture of the house when we purchased it in 1986. The bay windows were a leaded stained glass in a diamond pattern, the columns were half the current diameter and the smaller 6’8” door had a large solid square window above it with no panes, separated by a two ft. band of brick. Before moving in, we changed it to what you see above.
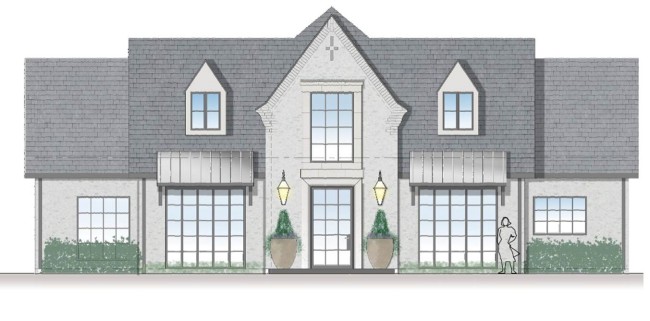
To see if my house could be turned into the exterior of my dreams, I asked architect Ken Newberry to create an exterior plan. He and his team, Will and Gina, did such a fabulous job with the interior plans that my expectations were high. Still, I was not prepared to be moved to tears when the plans were revealed. In the end, the best economic decision for this old house was to make cosmetic changes to the exterior followed by new landscaping. However, let it be said that those lovely, brilliant exterior plans are filed away for if /when I build someday….
Where to begin with the cosmetic changes? The first step was to change the brick and paint the trim. I considered paint, slurry and lime wash but ultimately decided on doing a lime wash. To revisit this process with me, read the blog on that decision making process and how to lime wash here!
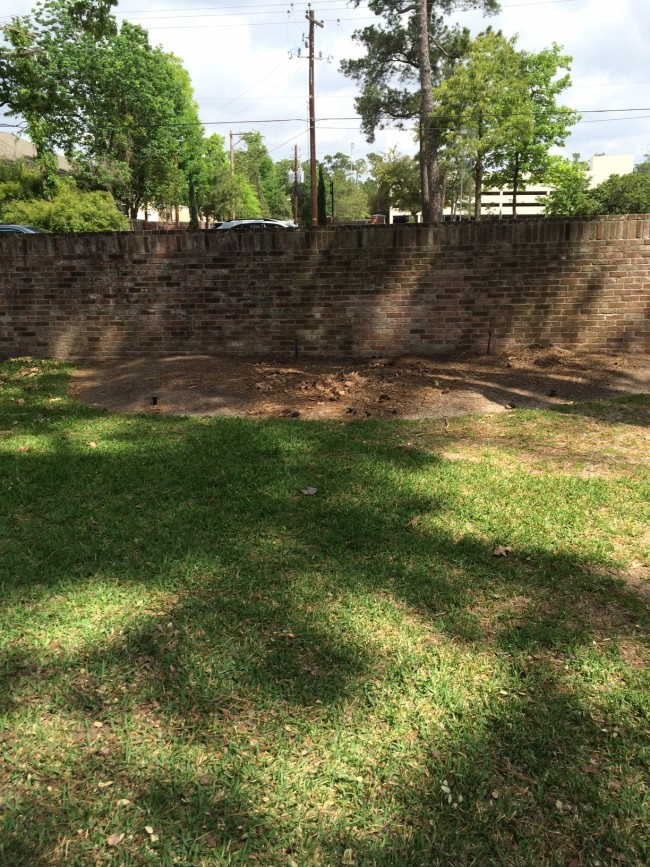
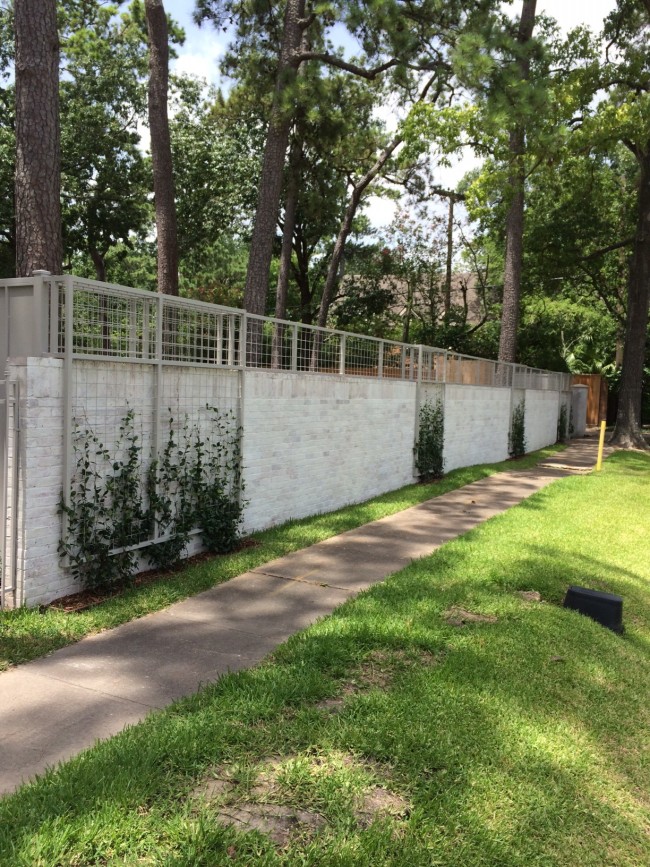
The brick wall in front of our home became a stronger buffer to the traffic beyond with the help of Michael Hutchins of Greentouch Landscape. He designed a metal trellis that extends up and over the existing brick which will eventually brim with star jasmine and both look and smell delicious! I painted the metal work SW 7017, Dorian Gray.
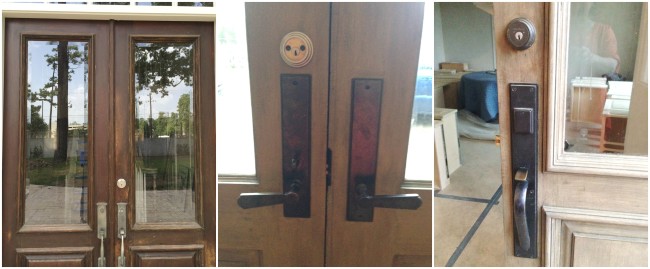
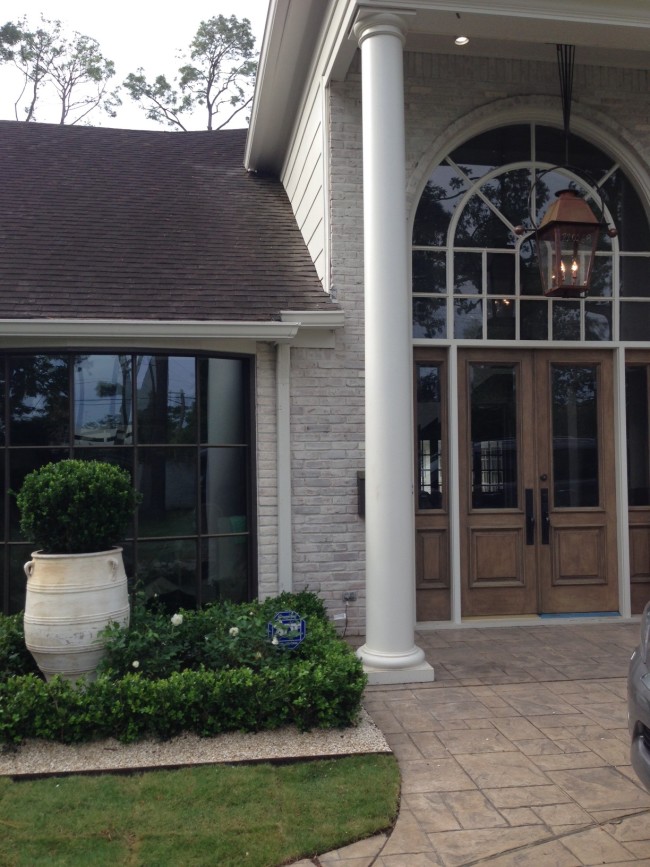
The doors’ ornate beveled glass from the 1980s was replaced with plain beveled glass to simplify the aesthetic. In the interest of keeping the project’s budget in check, I refrained from replacing the doors’ whole center structure with metal doors.
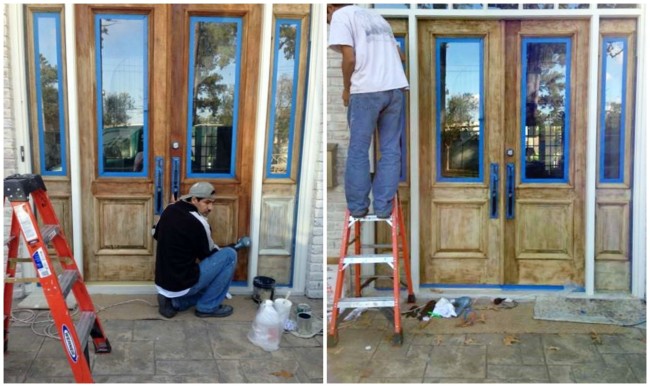
Instead, I stripped and bleached the doors to alter the dark mahogany finish to a more natural appearance. Easier said than done! Thirty years of protective exterior varnish stubbornly required repeated stripping before the bleaching could begin to take away the red tones of the mahogany.
The photo shows Charlie peeking through the back door which is receiving the same treatment as the front doors (after removing the back door’s wrought iron insets).
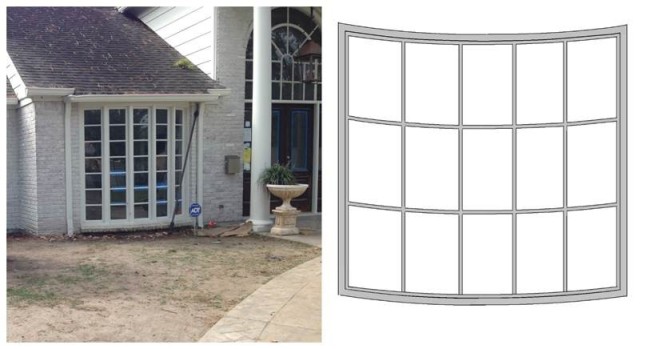
See the completed front door here. Over the years, we have repeatedly repaired the exterior bay windows due to the sprinklers spraying the wood. Not wanting to risk damaging the new wood floors in the interior (you can read all about them here!) it was decided to replace the wooden ones with metal. (Tip: Yard men will inadvertently redirect sprinkler heads, check bi-annually that they are spraying away from the house.)
Bill Pena of ACI Metalworks created the new, custom metal windows; designing a thinner profile and reducing the number of window squares from 35 to 15! Bill also worked on my new, interior staircase railing which I shared here!
If installing metal windows be sure to ask your fabricator what glazing options (glazing is the visible compound that holds glass in a window) are available before you give them a color to paint, because a window’s metal frame should be painted or fauxed to closely match the glazing material. I chose a dark bronze glazing.
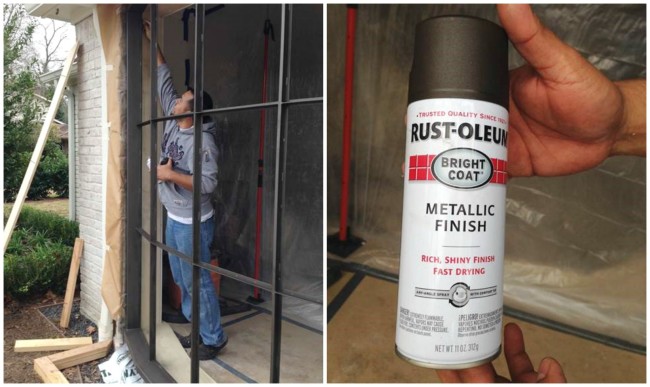
At first, the metal windows (without glass installed) were painted a harsh black, which I quickly determined had to be softened! Dashing to Home Depot in the one-day time frame before the glass was installed, I selected Rust-Oleum 7713 Dark Bronze. Tip: mist the spray paint for a custom look (as opposed to spraying a solid finish).
I became a misting maniac, applying the dark bronze treatment to my mailbox, my keyed locks and my outdoor planters. This $3.50 can of spray paint saved me from the expense of replacing special locks! However, I did replace the hardware with Rocky Mountain from Acero Bella (from whom I’ve purchased all my plumbing, sinks, appliances and handles).
And so, I now love my new metal windows! But in the spirit of ‘there’s no rest for the weary’, I’ve asked my builder, Steve Goodchild, to make the windows to the right of the new metal ones that have yet to be replaced the same height as the new, metal windows. These new, larger windows will be wood (not metal) to match the windows throughout the rest of the house. Steve has patiently embraced all of my ideas and has coordinated all the necessary tradesmen to get the job done.
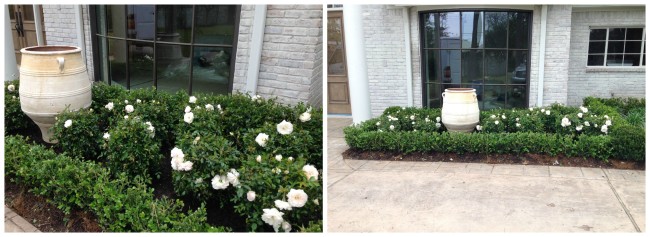
I am eager to show you more exterior progress soon, including the landscaping, which you can see is beginning to make a big difference. Onward!
I have always loved the aesthetic at Lam Bespoke, with their staple linen upholstered pieces, but I really loved the new items mixed in incorporating mid-century and modern components which are trending in today’s design. At last week’s book signing I got the chance to admire their beautiful pieces; complete with impressive pricing, here are some of my favorite pics. I highly recommend a visit!!
I’m Heading to Jackson, Mississippi!! If you’re in the area, stop by Antique Shops of Jackson and visit with me to get your copy of Segreto Style signed! It’s going to be such a fun event, bring a few friends – I hope to see you there!!!






Karena
Posted at 07:11h, 13 AprilLeslie your daughter is such a beauty (just like her mother!)
I am so astounded by the new exterior of your home!! It is so classically beautiful! Brava!
Have fun in Jackson at your book signing event!
Come over to see an amazing artist!
xoxo
Karena
The Arts by Karena
Artist Nathaniel Galka!
Leslie
Posted at 05:01h, 14 AprilHi Miss Karena!! For some reason I don’t get your posts now just occasionally! Will hop on over! xo
michele@hellolovelystudio
Posted at 13:57h, 13 Aprilthanks for so generously sharing your sources, leslie! bravo on the ingenuity and intelligence in solving these exterior design tweaks to achieve a completely custom and beautiful result. the attention to the front doors alone is inspiring–and i am so itching to bleach some wood! peace to you right where you are.
Leslie
Posted at 05:00h, 14 AprilYou always say the perfect thing! Peace is what I am needing right now! Let me know if you bleach something–It started with the floors then the doors, I would do it all! Love the effect! have a good one! xo Leslie
My Notting Hill
Posted at 17:32h, 13 AprilWhat a fabulous transformation!!
Leslie
Posted at 04:58h, 14 AprilThanks! The outside is almost there, the inside……. its coming! Have a great day and thanks for the comment!! xo
Gina Diamond
Posted at 18:37h, 13 AprilFirst your daughter looks fabulous! Love the outfit!
Second, your home transformation is outstanding. How exciting to be able to make these changes. I love the lime treatment, the metal windows, the doors, and your new urns in front. I just can’t wait the see the rest. Your puppy is so cute too!
Leslie
Posted at 04:57h, 14 AprilI am starting to see an end to all the dirt and dust!! It has been so much fun changing it to something so totally different! Happy Spring! xo Leslie
Taylor Greenwalt
Posted at 21:31h, 13 AprilYour daughter is adorable…just like her mama! Love the transformation…your doing a great job!
Leslie
Posted at 04:56h, 14 AprilShe is a cutie, but they all look much more like their Dad! Goodness so much harder doing your own home! Have a great week! xo leslie
Rié|Portobello Design Blog
Posted at 20:19h, 14 AprilLeslie, Your daughter is beautiful, no surprise there… just look at her mom! Love all of the transformation, but since I have an obsession with painted brick, I would have to say that is my favorite part! Beautiful! Rié
Leslie
Posted at 05:25h, 20 AprilHi Rie!! Its my new obsession as well–It amazes me how different the same house can look just by changing the paint color!!! Have a good week!! xo
Kim
Posted at 18:25h, 18 AprilOh, I am loving the new look!
KJ
Posted at 10:05h, 19 AprilI am very eager to follow this transformation! Those new windows are amazing! We have “old chicago” style brick that I am contemplating liming. It sounded like you were a little disappointed with the results on your last post about it? Did it just take time to adjust to or do you need all the other exterior elements completed before it has the “look” you were dreaming of?
Leslie
Posted at 05:29h, 20 AprilHmm, I am in love with the lime wash, not disappointed at all. I think what I was trying to say is it took a while to master or figure out the look I was going for because you can do it so many ways. I love it! Have a good one!!
airbnb property management sydney
Posted at 22:29h, 19 MarchThese tips are awesome, thanks for this one.
Leslie Sinclair
Posted at 06:30h, 23 MarchMy pleasure!! I love to share!
Michael P Fish
Posted at 15:45h, 31 MarchHi, I’m trying to determine what bleaching and finishing method you used on your mahogany doors? I have multiple raw mahogany doors that I would like to take the pinkish/red tones out of. Thank you for any help you can provide.
Leslie Sinclair
Posted at 07:31h, 09 AprilHI Michael, there is no true formula as every door is different and requires a unique mix of colors to mask the undertones. You can use any stripper, sometimes it takes Mutiple times to strip and then a wood bleach to take out the red. We still have to apply glazes to continue to tone the wood. I am so sorry I can’t provide you with step-by-step instructions. A good painter or finisher in your area should be able to help.