Lime Washing has so Many Applications!
HI Friends! I hope that your week was full of laughter and good things to come! Thank you so much for all who supported me during the awards ceremony!! Because of all of you Segreto Secrets made the short list!! I was honored to be a part of this amazing group of bloggers. Check out the winner-Alice in Scandiland! She has an awesome blog! Today I wanted to spread some joy I have gotten from some beautiful projects we have completed with lime washing!
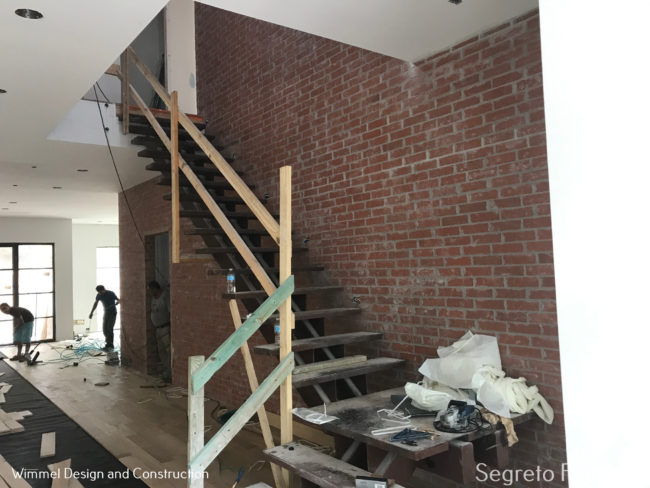
Remember that post I wrote on lime washing brick when I was trying to decide what I should do on my exterior? Well I have loved the outcome of my home and it has opened up so many different applications for the product! This is a project that we were collaborating on with the husband and wife design and build team Wimmel Design and Construction. They called us in to recommend a treatment for the brick. We felt lime washing rather than a slurry was the perfect application.
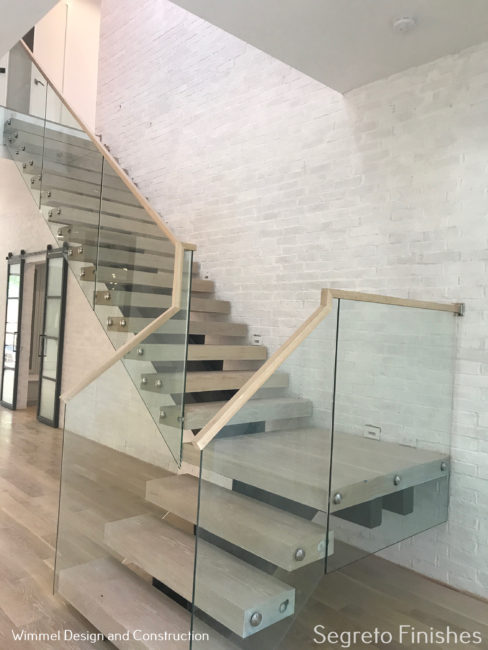
Here is the after! Of course everything they did is amazing! Look at that staircase and railing! STUNNING! I love in this instance how there is subtle variations of the brick showing though. Lime has a mat, chalky type appearance which really balances the contemporary element of the glass.
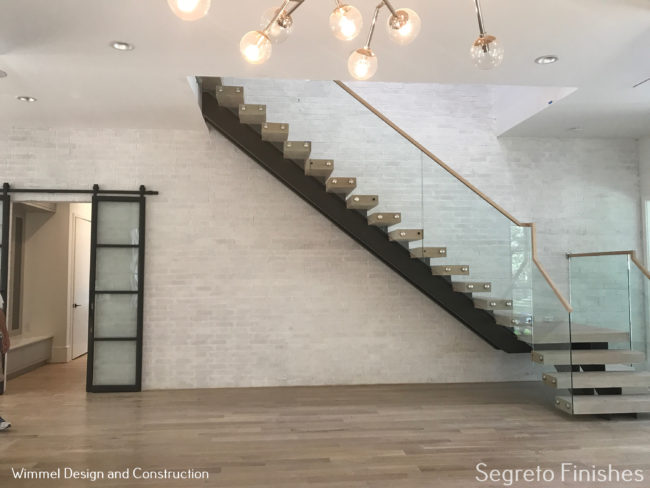
Here is another angle. When can I move in! If you are selecting brick to have limed with full coverage, the color isn’t important so a less expensive brick works just fine. The installation of it is a factor. The depth of the grout will affect the finish. I would recommend a small recess between the mortar and the brick.
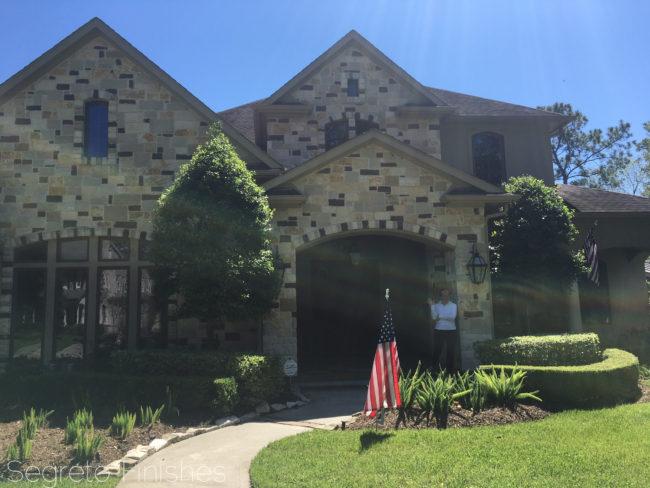
Here is my friend and client Anna in front of her home during our consult. Although she chose this stone years ago when they built their home, she now didn’t like its business. After getting bids on how much it would cost to change it out, she called me in to ask if there was anything I could do more cost effectively.
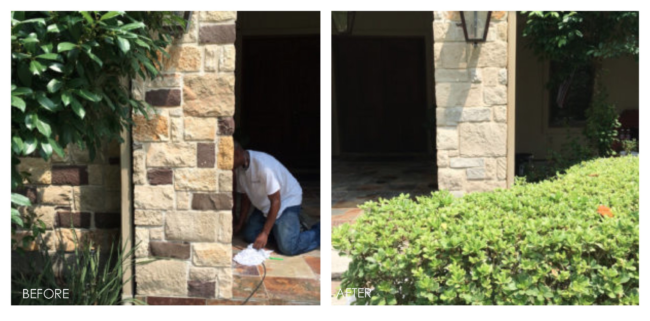
Having great outcomes with lime washing brick, I suggested using the same product for her stone. By tinting the lime to the grout color and diluting the product with water, the natural variations of the stone still showed through.
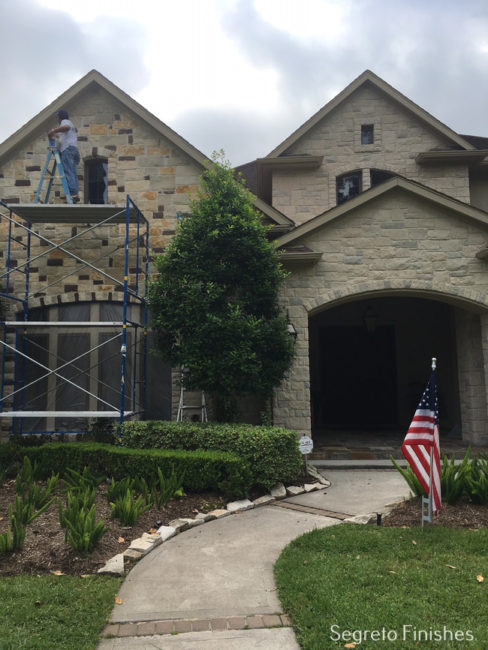
She was all in when she saw the sample and we began transforming her home.
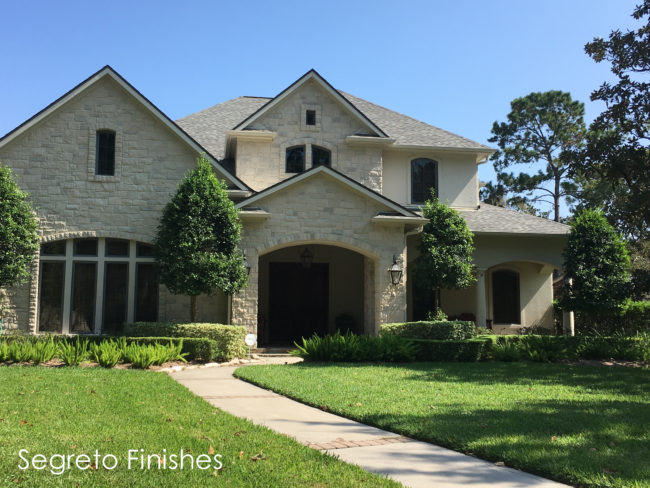
Since we were lightening up the stone, it was also decided to pick a new lighter color for the stucco and trim and using a darker accent only on the window surrounds. This looks like a different home, and accomplished affordably with using just lime and paint!!!

I loved this project with designer Garrett Hunter and architect Michael Landrum. Wanting a water color softness, we decided to apply a lime wash to the interior walls!! The walls need to be primed first with a special product which allows the lime to bond. Then you can wash over the surface with the diluted lime topcoat tinted to any color! On these walls the product was applied in a linear fashion creating a soft water color effect which I love.
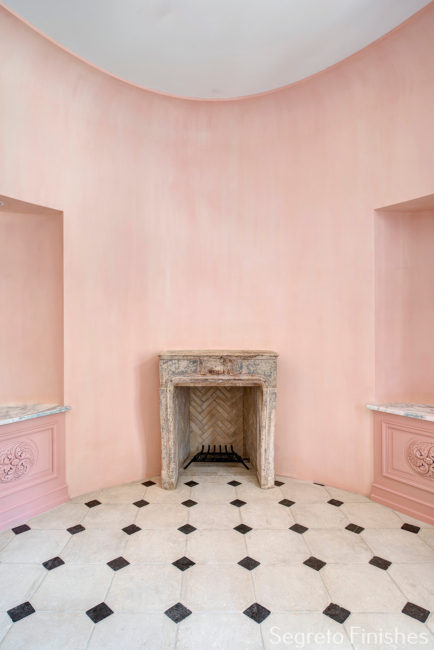
Because of the lime’s chalkiness, it is best to seal your walls with a dead flat acrylic varnish which will allow them to be cleaned without creating water stains.
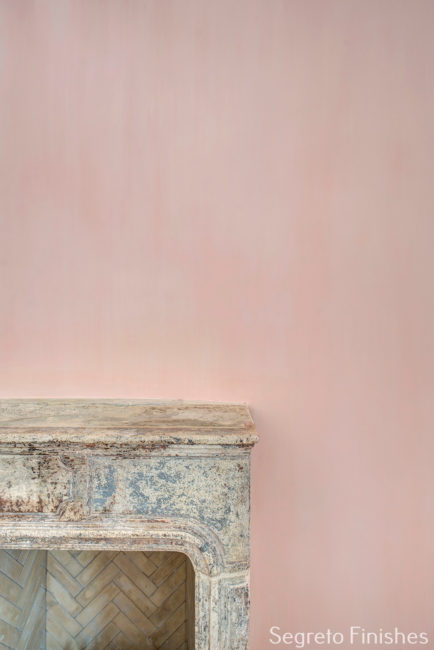
This application is linear, but the possibilities of this product is vast. Different colors can be layered and depending on your brush strokes, many different patterns can be created. Just remember all natural products have a mind of their own and exact precision in outcome is an impossibility.
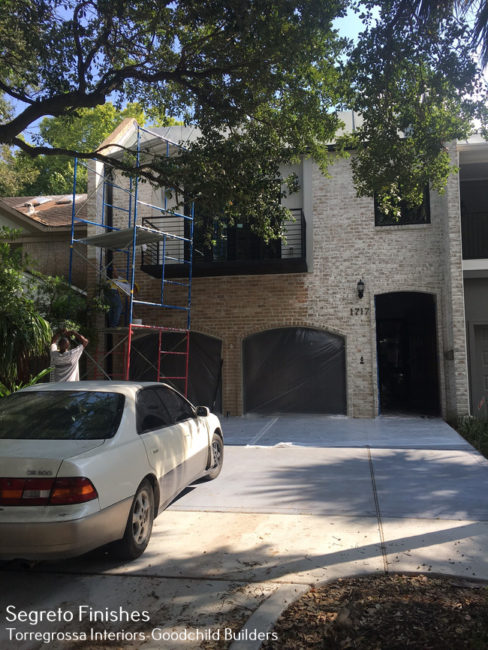
This is a renovation project with Torregrossa Interiors and Goodchild Builders. Look below the balcony–that is the brick before we started!! Wanting to modernize the exterior we applied the lime by carefully placing it on each brick individually rather than doing a consistent wash over the entire wall. This way, portions of the brick stayed its original color.
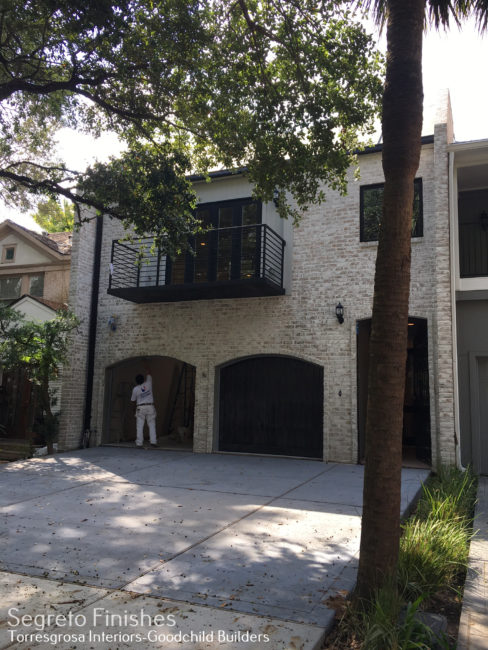
Here the painter is staining the garage doors a dark ebony to compliment the iron balcony and windows.
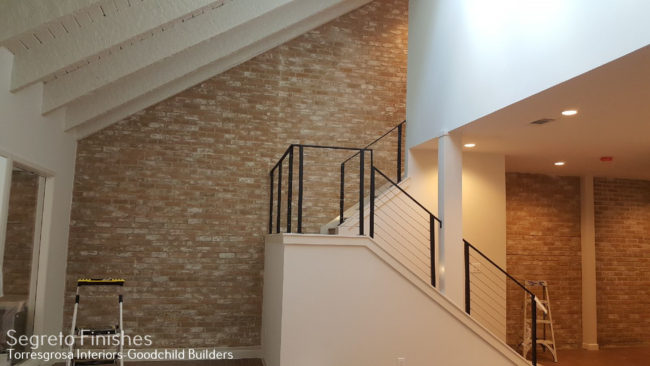
One side of the interior of the home is an exposed brick accent wall. Previously the same brick as the exterior, we applied lime tinted to the interior’s paint color more subtly than how we finished the brick on the exterior. The look is updated, the wall softened in appearance and the outcome more interesting! I so enjoyed this project with this dream design team!!!
Mineral paint, a historical wall application is making its way back in interiors of today. Starting with a primer base, two coats of your tinted paint is applied on top. Because the product is very thick, the finished product will be raised, kind of like a milder version of what a linear grass cloth would be like. It can be painted on walls or trim and has a soft chalky effect.
I hope everyone has a Happy Halloween. I hope you will all join me touring this AMAZING new showroom Tipler Collection at the Decorative Center in Houston!! Stay tuned next week to see what is trending for your Thanksgiving table!


Shannon Crain
Posted at 09:12h, 30 OctoberLovely!
Leslie Sinclair
Posted at 15:22h, 30 OctoberThank Shannon!! I could live in all of these homes!! Happy Halloween!
Teresa Knight
Posted at 13:37h, 30 OctoberThe brick wall looks amazing. The room looks brighter and larger as well. I love the home transformation with the lime and paint…..wish I lived in a brick or stone house so I could get that look….goodness, I am stuck with ugly siding!!!!!
Leslie Sinclair
Posted at 15:22h, 30 OctoberHi Teresa! Thanks for your comment!! It does make quite a transformation!! I have siding on my home as well. I hated the ugly brick I had till I lime washed it. Siding isn’t ugly though!! I’m sure your home is beautiful! Happy Halloween! xo
Amy Kloes
Posted at 09:11h, 31 OctoberThe front exterior of the house is completely transformed!! I can’t believe the before and after. It looks like a different home. ABSOLUTELY gorgeous!!
Leslie Sinclair
Posted at 12:20h, 01 NovemberHi Amy!! the homeowners were so happy!! That makes me sooo happy!!!
Gina@ginadiamondsflowerco
Posted at 22:18h, 31 OctoberLove these transformations. It truly updates each of the projects. I would not have thought it would work the same on the stone but it turned out beautiful. I love seeing your projects. They are beautiful and inspiring.
Leslie Sinclair
Posted at 12:19h, 01 NovemberHi Gina! Thank you! I love to share–I get to see so much!!!
Cathy
Posted at 08:57h, 02 NovemberDo you have details somewhere about how to do this, and what to use? We want to limewash our fireplace. It has a dark grey grout. We tried painting it with a watery paint but it just didn’t have the affect I was going for. Always love your beautiful posts!
Leslie Sinclair
Posted at 05:54h, 06 NovemberHi Cathy!! I will email you some details!!
Sarah Decker
Posted at 09:29h, 13 NovemberI may have missed this particular detail in your post, but what type of lime wash did you use? Your own recipe, or a specific brand? We want to lime wash our home. It is a traditional split level and needs some updating. Any advice on a color choice for the vinyl that would compliment this lime wash look?
Leslie Sinclair
Posted at 12:16h, 13 NovemberHi Sarah. Are you speaking of the interior or exterior? We used Roma–its out of Atlanta. You can have it tinted to any SW or BM color. Are you speaking of vinal siding? It depends what color you are painting it. Feel free to email me though the website as well! Cheers!!
Andrea
Posted at 13:41h, 02 FebruaryHi!! What was your experience with using dead flat acrylic varnish ? Can this be used on any lime wash?
Leslie Sinclair
Posted at 06:25h, 05 FebruaryYes that will work!!!